Centos/RHEL에 설치 하는 환경은 비슷하다
설치 환경
-
H/W : HP DL380G9 (2ea)
-
OS : UBUNTU 18.04 LTS
-
최소 자원
|
Node |
CPU |
RAM |
Disk |
Nic |
|
controller |
1 core |
4GB |
5GB |
2 |
|
compute |
1 core |
2GB |
10GB |
2 |
ubuntu 18.04 네트워크 설정 참고
https://help.ubuntu.com/lts/serverguide/network-configuration.html
1. Host networking ( all node)
1-1. Configure network interface
## manual interface up daemon file
## provider network interface setting on compute node

echo "[Unit]
Description=Service to bring up/down unconfigured nic Provider_ifname
After=network.target


[Service]
Type=oneshot
RemainAfterExit=yes
ExecStart=/sbin/ip link set Provider_ifname up
ExecStop=/sbin/ip link set Provider_ifname down


[Install]
WantedBy=multi-user.target
" >> /etc/systemd/system/manual-iface.service


systemctl daemon-reload
sudo systemctl enable manual-iface.service
sudo systemctl start manual-iface.service
또는 (필자는 아래 방법을 주로 사용하였습니다.)
root@rocky-osc:~# PROVIDER_NET_IFNAME="eth2"            ## Provider로 사용할 인터페이스명을 입력한다.

root@rocky-osc:~# echo "## openstack rocky
[Match]
Name=${PROVIDER_NET_IFNAME}

[Network]
LinkLocalAddressing=no
IPv6AcceptRA=no
" >> /etc/systemd/network/${PROVIDER_NET_IFNAME}.network


root@rocky-osc:~# systemctl restart systemd-networkd
1-2. configure name resolution
root@rocky-osc:~# echo "
## controller
10.168.0.101    controller
## compute node
10.168.0.111    nova01 compute01" >> /etc/hosts
2. NTP Setting
2-1. Install NTP PKG (chrony pkg )
-
NTP PKG 설치 여부 확인
root@rocky-osc:~# dpkg -l | grep chrony
-
NTP PKG 설치
root@rocky-nova01:~# apt install chrony -y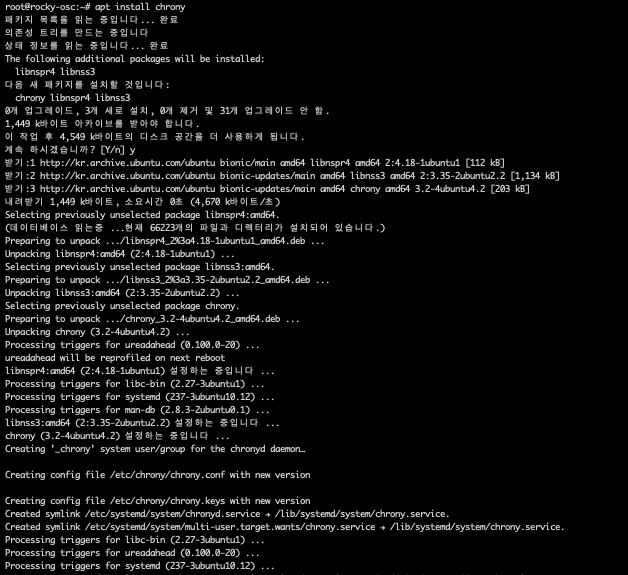
-
NTP 설정 (Chrony 설정)
-
controller node
root@rocky-nova01:~# vi /etc/chrony/chrony.conf
#pool ntp.ubuntu.com        iburst maxsources 4
#pool 0.ubuntu.pool.ntp.org iburst maxsources 1
#pool 1.ubuntu.pool.ntp.org iburst maxsources 1
#pool 2.ubuntu.pool.ntp.org iburst maxsources 2
server i192.168.1.251 iburst

allow 10.168.0.0/24
allow 192.168.0.0/16
allow 172.10.0.0/20-
compute node
root@rocky-nova01:~# vi /etc/chrony/chrony.conf
#pool ntp.ubuntu.com        iburst maxsources 4
#pool 0.ubuntu.pool.ntp.org iburst maxsources 1
#pool 1.ubuntu.pool.ntp.org iburst maxsources 1
#pool 2.ubuntu.pool.ntp.org iburst maxsources 2
server controller iburst-
NTP daemon restart (chronyd)
# systemctl restart chronyd.service
-
NTP status
-
controller node
root@rocky-osc:~# chronyc sources
210 Number of sources = 1
MS Name/IP address         Stratum Poll Reach LastRx Last sample
===============================================================================
^* 192.168.1.251                 2   6    17    25  -6172ns[ -103us] +/-   73ms
-
compute node
root@rocky-nova01:~# chronyc sources
210 Number of sources = 1
MS Name/IP address         Stratum Poll Reach LastRx Last sample
===============================================================================
^? controller                    3   6     3     1  -2950us[-2950us] +/-   74ms
3. Openstack PKG install
3-1. openstack pkg 설치
root@rocky-osc:~# apt install software-properties-common
패키지 목록을 읽는 중입니다... 완료
의존성 트리를 만드는 중입니다
상태 정보를 읽는 중입니다... 완료
software-properties-common is already the newest version (0.96.24.32.7).
0개 업그레이드, 0개 새로 설치, 0개 제거 및 35개 업그레이드 안 함.
root@rocky-osc:~# add-apt-repository cloud-archive:rocky
Ubuntu Cloud Archive for OpenStack Rocky
More info: https://wiki.ubuntu.com/ServerTeam/CloudArchive
Press [ENTER] to continue or Ctrl-c to cancel adding it.


패키지 목록을 읽는 중입니다...
의존성 트리를 만드는 중입니다...
상태 정보를 읽는 중입니다...
다음 새 패키지를 설치할 것입니다:
  ubuntu-cloud-keyring
0개 업그레이드, 1개 새로 설치, 0개 제거 및 35개 업그레이드 안 함.
6,008 바이트 아카이브를 받아야 합니다.
이 작업 후 22.5 k바이트의 디스크 공간을 더 사용하게 됩니다.
받기:1 http://kr.archive.ubuntu.com/ubuntu bionic-updates/main amd64 ubuntu-cloud-keyring all 2018.09.18.1~18.04.0 [6,008 B]
내려받기 6,008 바이트, 소요시간 0초 (23.9 k바이트/초)
Selecting previously unselected package ubuntu-cloud-keyring.
(데이터베이스 읽는중 ...현재 66295개의 파일과 디렉터리가 설치되어 있습니다.)
Preparing to unpack .../ubuntu-cloud-keyring_2018.09.18.1~18.04.0_all.deb ...
Unpacking ubuntu-cloud-keyring (2018.09.18.1~18.04.0) ...
ubuntu-cloud-keyring (2018.09.18.1~18.04.0) 설정하는 중입니다 ...
기존:1 http://kr.archive.ubuntu.com/ubuntu bionic InRelease
받기:2 http://kr.archive.ubuntu.com/ubuntu bionic-updates InRelease [88.7 kB]
받기:3 http://kr.archive.ubuntu.com/ubuntu bionic-backports InRelease [74.6 kB]
받기:4 http://kr.archive.ubuntu.com/ubuntu bionic-updates/main amd64 Packages [538 kB]
받기:5 http://kr.archive.ubuntu.com/ubuntu bionic-updates/main i386 Packages [460 kB]
받기:6 http://kr.archive.ubuntu.com/ubuntu bionic-updates/main Translation-en [200 kB]
받기:7 http://kr.archive.ubuntu.com/ubuntu bionic-updates/universe amd64 Packages [738 kB]
받기:8 http://security.ubuntu.com/ubuntu bionic-security InRelease [88.7 kB]
받기:9 http://kr.archive.ubuntu.com/ubuntu bionic-updates/universe i386 Packages [728 kB]
받기:10 http://kr.archive.ubuntu.com/ubuntu bionic-updates/universe Translation-en [190 kB]
무시:11 http://ubuntu-cloud.archive.canonical.com/ubuntu bionic-updates/rocky InRelease
받기:12 http://ubuntu-cloud.archive.canonical.com/ubuntu bionic-updates/rocky Release [7,879 B]
받기:13 http://ubuntu-cloud.archive.canonical.com/ubuntu bionic-updates/rocky Release.gpg [543 B]
받기:14 http://security.ubuntu.com/ubuntu bionic-security/main i386 Packages [206 kB]
받기:15 http://ubuntu-cloud.archive.canonical.com/ubuntu bionic-updates/rocky/main amd64 Packages [114 kB]
받기:16 http://security.ubuntu.com/ubuntu bionic-security/main amd64 Packages [277 kB]
받기:17 http://ubuntu-cloud.archive.canonical.com/ubuntu bionic-updates/rocky/main i386 Packages [114 kB]
내려받기 3,825 k바이트, 소요시간 4초 (856 k바이트/초)
패키지 목록을 읽는 중입니다... 완료


root@rocky-osc:~# apt update && apt dist-upgrade -y
"keep the local version currently installed" 선택

3-2. update 및 upgrade 반영을 위해 system reboot (all node)
root@rocky-osc:~# sync ; sync; sync; reboot3-3. Openstack client install (all node)
root@rocky-osc:~# apt install python-openstackclient -y3-4. SQL Database install (controller node)
root@rocky-osc:~# apt install mariadb-server python-pymysql -y3-4-1. Maria db configure file 생성
root@rocky-osc:~# echo "[mysqld]
bind-address = 10.168.0.101

default-storage-engine = innodb
innodb_file_per_table = on
max_connections = 4096
collation-server = utf8_general_ci
character-set-server = utf8" >> /etc/mysql/mariadb.conf.d/99-openstack.cnf

3-4-2. Maria DB 실행
root@rocky-osc:~# service mysql restart
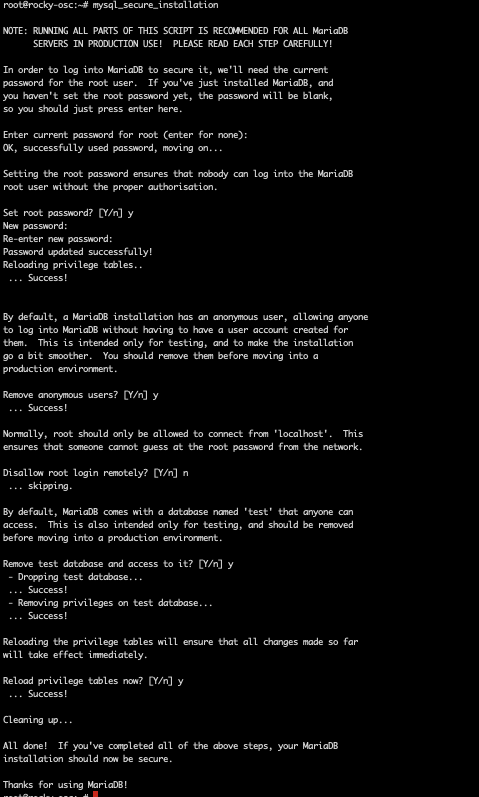
3-4-3. Maria DB root PW setting
root@rocky-osc:~# mysql_secure_installation


NOTE: RUNNING ALL PARTS OF THIS SCRIPT IS RECOMMENDED FOR ALL MariaDB
      SERVERS IN PRODUCTION USE!  PLEASE READ EACH STEP CAREFULLY!


In order to log into MariaDB to secure it, we'll need the current
password for the root user.  If you've just installed MariaDB, and
you haven't set the root password yet, the password will be blank,
so you should just press enter here.


Enter current password for root (enter for none):  Enter
OK, successfully used password, moving on...


Setting the root password ensures that nobody can log into the MariaDB
root user without the proper authorisation.


Set root password? [Y/n] y
New password:  DB_ROOT_PW
Re-enter new password: DB_ROOT_PW
Password updated successfully!
Reloading privilege tables..
... Success!


By default, a MariaDB installation has an anonymous user, allowing anyone
to log into MariaDB without having to have a user account created for
them.  This is intended only for testing, and to make the installation
go a bit smoother.  You should remove them before moving into a
production environment.


Remove anonymous users? [Y/n] y
... Success!


Normally, root should only be allowed to connect from 'localhost'.  This
ensures that someone cannot guess at the root password from the network.


Disallow root login remotely? [Y/n] n
... skipping.


By default, MariaDB comes with a database named 'test' that anyone can
access.  This is also intended only for testing, and should be removed
before moving into a production environment.


Remove test database and access to it? [Y/n] y
- Dropping test database...
... Success!
- Removing privileges on test database...
... Success!


Reloading the privilege tables will ensure that all changes made so far
will take effect immediately.


Reload privilege tables now? [Y/n] y
... Success!


Cleaning up...


All done!  If you've completed all of the above steps, your MariaDB
installation should now be secure.


Thanks for using MariaDB!
3-5. Message queue (rabbitmq) Install (controller node)
3-5-1. Rabbitmq PKG install
root@rocky-osc:~# apt install rabbitmq-server -y
3-5-2. Rabbitmq add user & pw
root@rocky-osc:~# rabbitmqctl add_user openstack rabbit.123
Creating user "openstack"
3-5-3. Rabbitmq 유저 권한 설정
root@rocky-osc:~# rabbitmqctl set_permissions openstack ".*" ".*" ".*"
Setting permissions for user "openstack" in vhost "/"
3-6. Memcached Install (controller node)
3-6-1. Memcached PKG install
root@rocky-osc:~# apt install memcached python-memcache -y
3-6-2. configure modify
root@rocky-osc:~# sed -i "s/^-l 127.0.0.1/-l 10.168.0.101/g" /etc/memcached.conf
** Configure 변경 확인
root@rocky-osc:~# cat  /etc/memcached.conf
# memcached default config file
# 2003 - Jay Bonci <jaybonci@debian.org>
# This configuration file is read by the start-memcached script provided as
# part of the Debian GNU/Linux distribution.


# Run memcached as a daemon. This command is implied, and is not needed for the
# daemon to run. See the README.Debian that comes with this package for more
# information.
-d


# Log memcached's output to /var/log/memcached
logfile /var/log/memcached.log


# Be verbose
# -v


# Be even more verbose (print client commands as well)
# -vv


# Start with a cap of 64 megs of memory. It's reasonable, and the daemon default
# Note that the daemon will grow to this size, but does not start out holding this much
# memory
-m 64


# Default connection port is 11211
-p 11211


# Run the daemon as root. The start-memcached will default to running as root if no
# -u command is present in this config file
-u memcache


# Specify which IP address to listen on. The default is to listen on all IP addresses
# This parameter is one of the only security measures that memcached has, so make sure
# it's listening on a firewalled interface.
-l 10.168.0.101


# Limit the number of simultaneous incoming connections. The daemon default is 1024
# -c 1024


# Lock down all paged memory. Consult with the README and homepage before you do this
# -k


# Return error when memory is exhausted (rather than removing items)
# -M


# Maximize core file limit
# -r


# Use a pidfile
-P /var/run/memcached/memcached.pid
3-6-3. Memcached 재시작
root@rocky-osc:~# service memcached restart
3-7. ETCD install (controller node)
3-7-1. ETCD pkg install
root@rocky-osc:~# apt install etcd -y
3-7-2. ETCD configure
root@rocky-osc:~# cp -prRf /etc/default/etcd /etc/default/etcd.bak

root@rocky-osc:~# echo "ETCD_NAME=\"controller\"
ETCD_DATA_DIR=\"/var/lib/etcd\"
ETCD_INITIAL_CLUSTER_STATE=\"new\"
ETCD_INITIAL_CLUSTER_TOKEN=\"etcd-cluster-01\"
ETCD_INITIAL_CLUSTER=\"controller=http://10.168.0.101:2380\"
ETCD_INITIAL_ADVERTISE_PEER_URLS=\"http://10.168.0.101:2380\"
ETCD_ADVERTISE_CLIENT_URLS=\"http://10.168.0.101:2379\"
ETCD_LISTEN_PEER_URLS=\"http://0.0.0.0:2380\"
ETCD_LISTEN_CLIENT_URLS=\"http://10.168.0.101:2379\"" >> /etc/default/etcd
3-7-3. ETCD daemon enable 및 start
root@rocky-osc:~# systemctl enable etcd
Synchronizing state of etcd.service with SysV service script with /lib/systemd/systemd-sysv-install.
Executing: /lib/systemd/systemd-sysv-install enable etcd
Created symlink /etc/systemd/system/etcd2.service → /lib/systemd/system/etcd.service.

root@rocky-osc:~# systemctl start etcd
root@rocky-osc:~# systemctl status etcd
● etcd.service - etcd - highly-available key value store
   Loaded: loaded (/lib/systemd/system/etcd.service; enabled; vendor preset: enabled)
   Active: active (running) since Tue 2019-04-16 23:52:11 KST; 3 months 30 days ago
     Docs: https://github.com/coreos/etcd
           man:etcd
 Main PID: 12990 (etcd)
    Tasks: 44 (limit: 4915)
   CGroup: /system.slice/etcd.service
           └─12990 /usr/bin/etcd

 4월 16 23:52:11 rocky-osc etcd[12990]: 8e9e05c52164694d received MsgVoteResp from 8e9e05c52164694d at term 2
 4월 16 23:52:11 rocky-osc etcd[12990]: 8e9e05c52164694d became leader at term 2
 4월 16 23:52:11 rocky-osc etcd[12990]: raft.node: 8e9e05c52164694d elected leader 8e9e05c52164694d at term 2
 4월 16 23:52:11 rocky-osc etcd[12990]: setting up the initial cluster version to 3.2
 4월 16 23:52:11 rocky-osc etcd[12990]: ready to serve client requests
 4월 16 23:52:11 rocky-osc etcd[12990]: set the initial cluster version to 3.2
 4월 16 23:52:11 rocky-osc etcd[12990]: published {Name:rocky-osc ClientURLs:[http://localhost:2379]} to cluster cdf818194e3a8c32
 4월 16 23:52:11 rocky-osc etcd[12990]: enabled capabilities for version 3.2
 4월 16 23:52:11 rocky-osc etcd[12990]: serving insecure client requests on 127.0.0.1:2379, this is strongly discouraged!
 4월 16 23:52:11 rocky-osc systemd[1]: Started etcd - highly-available key value store.